A door jamb is easy to overlook until something goes wrong. If a door sticks, leaves uneven gaps, or no longer latches properly, the jamb may be part of the problem.
This guide explains what a door jamb is, what it does, and how it differs from similar door parts like the frame and casing.
What Is a Door Jamb?
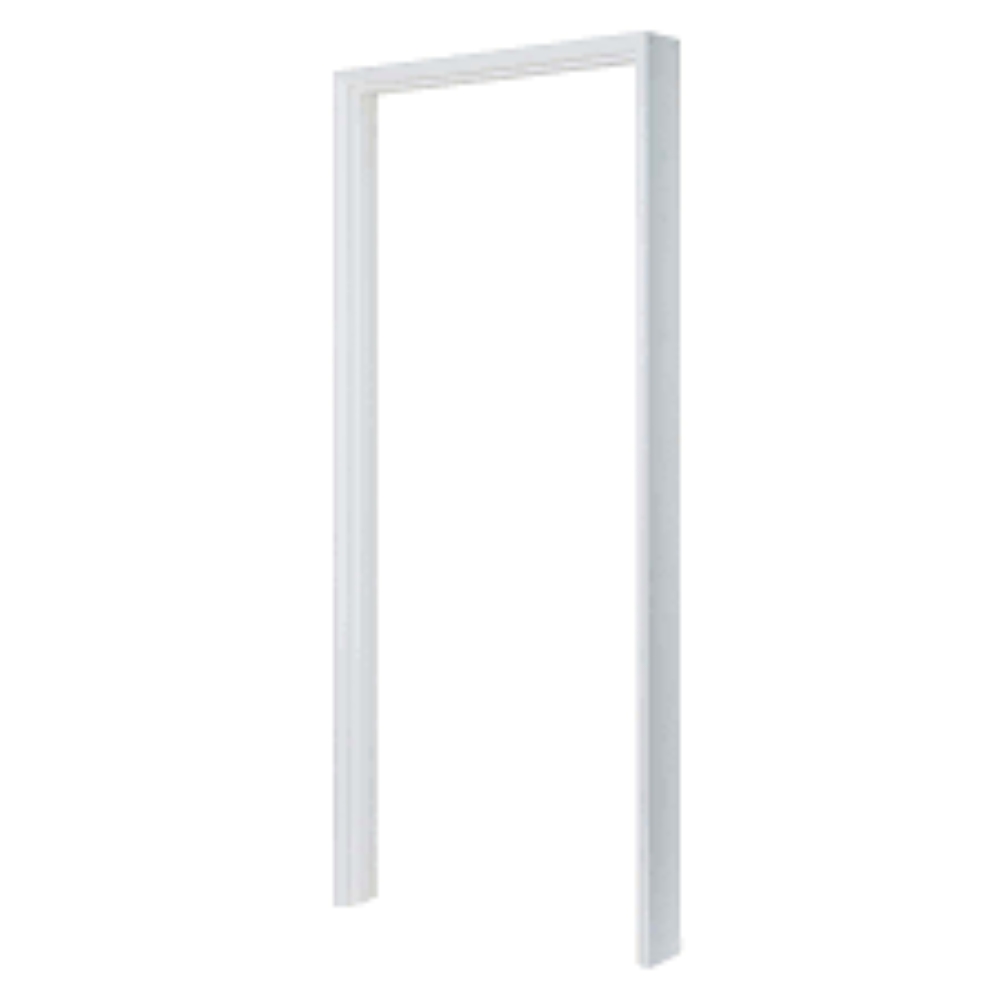
A door jamb is the part of the door frame that sits along the sides and top of a door opening. It helps the door hang correctly, close securely, and stay aligned.
The hinges are attached to one side of the jamb, while the latch or deadbolt meets the strike plate on the opposite side. When the jamb is properly installed, the door should open, close, and latch smoothly.
In everyday use, people often use “door jamb” to mean the two vertical side pieces of the frame. More technically, a complete jamb set can include:
- Hinge jamb: the side where the hinges are installed
- Strike jamb or latch jamb: the side where the latch and strike plate meet
- Head jamb: the horizontal piece across the top of the door
A door jamb is not the same as the entire door frame or the decorative trim around the door. The frame is the larger structure around the opening, while the trim, also called casing, covers the gap between the wall and the frame.
Door Jamb vs. Door Frame: What’s the Difference?
A door jamb and a door frame are closely related, but they are not the same.
The door frame is the complete structure around the door opening. The door jamb is one main part of that frame, where the hinges, latch, and strike plate work together to help the door open, close, and lock properly.
In simple terms, the door frame is the full assembly, while the door jamb is a key working part within it.
| Feature | Door Jamb | Door Frame |
|---|---|---|
| Meaning | A main part of the door frame | The complete structure around the door opening |
| Main role | Holds the hinges, strike plate, and helps the door align and latch | Supports the entire door system and connects it to the wall |
| Includes | Hinge jamb, strike jamb, and head jamb | Jambs, head, sill, threshold, casing, and other frame parts |
| Common confusion | Often mistaken for the whole door frame | Often used as a general term for the full door opening assembly |
This difference matters when you are repairing or replacing a door. If only the hinge side or latch side is damaged, a door jamb repair may be enough. If the wider structure is warped, rotted, or out of square, the door frame may need repair or replacement.
How Much Does a Door Jamb Cost?
The cost of a door jamb depends on the material, door type, damage level, and whether you install it yourself or hire a professional. A basic DIY door jamb kit may cost around $30 to $70, while professional installation is commonly estimated at $150 to $250. Door jamb repair or replacement often falls around $180 to $300, depending on the work needed.
| Project Type | Typical Cost Range | Best For |
|---|---|---|
| DIY door jamb kit | $30–$70 | Simple interior door projects |
| Professional door jamb installation | $150–$250 | New jamb installation or basic replacement |
| Door jamb repair or replacement | $180–$300 | Cracks, splits, rot, or alignment issues |
| Full door frame replacement | $200–$550+ | Wider frame damage, severe rot, or structural problems |
Costs can increase for exterior door jambs, custom sizes, water damage, painting, casing, weatherstripping, or hardware adjustment. If only one side of the jamb is damaged, a targeted repair may be enough. If the wider frame is warped, rotted, or out of square, a full door frame replacement may be the better long-term fix.
What Are the Different Types of Door Jambs?
Door jambs come in different styles depending on the door type, wall thickness, installation method, and whether the door is used indoors or outdoors. The right door jamb type helps the door fit properly, close smoothly, and stay secure over time.
| Door Jamb Type | What It Is | Best For |
|---|---|---|
| Flat jamb | A simple, flat board-style jamb without a built-in stop | Interior doors and basic trim installations |
| Rabbeted jamb | A jamb with a recessed edge where the door closes into the frame | Doors that need a tighter, cleaner fit |
| Split jamb | A two-piece jamb that fits around the wall from both sides | Homes with uneven or non-standard wall thickness |
| Prehung door jamb | A jamb that comes already attached to a door slab | Faster installation and full door replacement |
| Interior door jamb | A lighter-duty jamb used for rooms, closets, and hallways | Bedrooms, bathrooms, closets, and interior spaces |
| Exterior door jamb | A stronger jamb designed for weather exposure and security | Entry doors, patio doors, and exterior openings |
A flat jamb is one of the simplest options and is often used for interior doors. It usually needs separate stop molding to keep the door from swinging too far.
A rabbeted jamb has a built-in step or recess, allowing the door to close more tightly into the frame. This style is common where a cleaner fit or better sealing is needed.
A split jamb is helpful when the wall thickness is not perfectly standard. Since it comes in two sections, it can be adjusted more easily during installation.
A prehung door jamb is commonly used when replacing an entire door unit. The door already comes mounted in the jamb, which can save time and reduce alignment issues.
For most homeowners, the most important choice is between an interior door jamb and an exterior door jamb. Interior jambs are usually simpler and lighter, while exterior jambs need to handle weather, moisture, insulation, and security.
What Materials Are Door Jambs Made From?
Door jambs can be made from several materials, and the best choice depends on where the door is installed, how much moisture it faces, and how durable it needs to be.
| Material | Best For | Pros | Cons |
|---|---|---|---|
| Solid wood | Interior doors, traditional homes, stain-grade finishes | Strong, repairable, natural look | Can warp, crack, or rot if exposed to moisture |
| Finger-jointed wood | Painted interior door jambs | Stable, cost-effective, easy to paint | Not ideal for high-moisture areas |
| MDF | Budget interior projects | Smooth surface, affordable | Swells easily if it gets wet |
| Composite | Exterior door jambs and damp areas | Resists rot, insects, and moisture better than wood | Usually costs more than basic wood |
| Aluminum | Storefront doors, patio doors, sliding doors, modern exterior systems | Lightweight, corrosion-resistant, low maintenance | Can dent, may conduct heat or cold, less traditional in appearance |
| Steel | Commercial doors, security doors, utility spaces | Very strong, durable, and secure | Heavy, harder to modify, can rust if coating is damaged |
| Vinyl or fiberglass | Exterior doors and low-maintenance applications | Moisture-resistant and low maintenance | Fewer style and repair options |
For most interior doors, wood, finger-jointed wood, or MDF door jambs are common choices. They are easy to paint and work well in dry areas.
For exterior doors, moisture resistance matters more. Composite, aluminum, vinyl, fiberglass, steel, or properly treated wood door jambs may be used depending on the door system, climate, security needs, and design style.
Aluminum door jambs are often used in modern exterior systems, patio doors, sliding doors, and commercial storefronts. They are lightweight and resistant to corrosion, but they can dent and may transfer heat or cold more easily than some insulated materials.
The key is to match the material to the location. A basic MDF jamb may be fine for a closet door, but it is a poor choice for an entry door, bathroom, or other area where moisture is more likely.
How Do You Install a Door Jamb?
Installing a door jamb requires careful measuring, leveling, and alignment. The goal is to make sure the jamb is straight, square, and secure so the door can open, close, and latch smoothly.
Measure the Door Opening
Measure the width, height, and wall thickness of the opening. The jamb needs to match both the door size and the depth of the wall.
Cut the Jamb Pieces
A standard door jamb usually includes two side jambs and one head jamb. Cut each piece carefully so the corners fit squarely.
Assemble the Jamb Frame
Attach the head jamb to the two side jambs. Before moving forward, check that the frame is square and the joints are tight.
Place the Jamb in the Opening
Set the assembled jamb into the rough opening. Use shims to hold it in position and create even spacing around the door.
Check Level, Plumb, and Square
Use a level to make sure the side jambs are vertical and the head jamb is horizontal. Check both sides before fastening anything permanently.
Secure the Door Jamb
Fasten the jamb through the shims into the wall framing. Avoid overtightening the screws, as this can pull the jamb out of alignment.
Hang the Door and Test the Fit
Install the hinges, hang the door, and test how it opens, closes, and latches. The gaps around the door should look even.
Add Trim and Finish
Trim off extra shim material, install the casing, and finish the jamb with caulk, paint, or stain as needed.
For a prehung door, the process is usually easier because the door is already attached to the jamb. For an exterior door jamb, pay extra attention to sealing, threshold alignment, weatherstripping, and security hardware.
How Do You Fix a Door Jamb?
How you fix a door jamb depends on the problem. For loose hinge screws, use longer screws or fill the stripped holes with wood plugs before reinstalling the screws. For a misaligned latch, adjust the strike plate slightly so the latch can catch properly. Small cracks or dents can often be repaired with wood filler, sanding, and repainting.
If the jamb is badly split, rotted, or damaged near the lock area, a simple patch may not be strong enough. In that case, you may need to replace part of the jamb or reinforce the strike side with a repair plate. For exterior door jambs with water damage or security issues, professional repair is usually the safer choice.
Conclusion
A door jamb may look like a small part of a doorway, but it plays an important role in how well a door opens, closes, locks, and stays aligned. Choosing the right jamb, installing it correctly, and repairing damage early can help prevent bigger door problems later.
Want to learn more about door jambs or need help choosing the right door solution? Contact us today!
Measure the wall thickness, door opening width, opening height, and existing jamb depth. The jamb should match the wall depth and fit the door properly, not just the door slab size.
To replace a door jamb, first remove the door, casing, and damaged jamb section. Measure the opening carefully, cut the new jamb to size, then position it in the opening with shims. Check that it is level, plumb, and square before fastening it to the wall framing. After that, reinstall the door, test the fit, and add casing, caulk, paint, or stain as needed.
For exterior doors, replacement is more complex because the jamb may also affect weather sealing, threshold alignment, and security. If the jamb is badly rotted, out of square, or part of a full entry door system, professional installation is usually the safer choice.
To measure a door jamb, start by measuring the wall thickness from one finished wall surface to the other. Then measure the height and width of the door opening, along with the existing jamb depth if you are replacing an old jamb.
Do not measure only the door slab. The correct jamb size depends on the wall thickness, door size, rough opening, flooring, and whether the door is interior or exterior. For best results, measure in more than one spot, since older walls may not be perfectly even.
A typical wood door jamb is about 11/16 inch to 3/4 inch thick. Some products may be thicker depending on the material, door type, and manufacturer.
The most common standard door jamb width is 4-9/16 inches, which usually fits a standard 2×4 wall with 1/2-inch drywall on both sides. For thicker 2×6 walls, 6-9/16 inches is also common. Always measure the wall thickness before choosing a jamb.